Migrate to SSD

In my previous post, I mentioned I have boot issue. Then I asked in Arch Linux BBS, and I got some useful advice from other users. As a result, I contacted a computer shop in my town, in order to get a hard drive (HDD). However, the shop doesn’t have 7200 rpm HDD. Then he suggested SSD to me, which is 1T storage. The SSD now is much cheaper comparing to two years ago.

I remembered that SSD, requires some special configuration, due to “limited write-life” [1]. Spending around one week time, I searched for the recommended tweaks and modified the setup in order to cope my working environment.

The following is the summary of my SSD configurations:

  1. The partitions should be mounted with noatime option.
  2. When creating partition, should be aligned properly, which fdisk should handle it automatically. [2]
  3. Enable fstrim
  4. Do not use swap partition, as fstrim does not work on swap partition [3][4]. Though, “swap system has automatically supported TRIM capable devices” [5]
  5. 8G RAM is not enough for my working environment. I created swap file instead of swap partition
  6. Set swappiness [6]
  7. If 8G RAM is enough, then can use zram (using zram-generator).

[1] Dell, “Hard Drive – Why Do Solid State Devices (SSD) Wear Out,” Dell.com, Sep. 28, 2021. https://www.dell.com/support/kbdoc/en-my/000137999/hard-drive-why-do-solid-state-devices-ssd-wear-out. (accessed Apr. 14, 2022).

[2] “Should I align partitions on an SSD, if so how do I do it at install time?,” Ask Ubuntu, Dec. 26, 2010. https://askubuntu.com/questions/18900/should-i-align-partitions-on-an-ssd-if-so-how-do-i-do-it-at-install-time#18951 (accessed Apr. 16, 2022).

[3] “fstrim does not trim swap,” Unix & Linux Stack Exchange, Dec. 12, 2019. https://unix.stackexchange.com/questions/556805/fstrim-does-not-trim-swap#558223 (accessed Apr. 16, 2022).

[4] “why not use Swap file on SSDs instead of Swap partition?,” Ask Ubuntu, Nov. 11, 2016. https://askubuntu.com/questions/848230/why-not-use-swap-file-on-ssds-instead-of-swap-partition?noredirect=1&lq=1#1290562 (accessed Apr. 16, 2022).

[5] “SwapFaq – Community Help Wiki,” Ubuntu.com, 2022. https://help.ubuntu.com/community/SwapFaq (accessed Apr. 16, 2022).

[6] Why, “Why are swap partitions discouraged on SSD drives, are they harmful?,” Ask Ubuntu, Jul. 24, 2015. https://askubuntu.com/questions/652337/why-are-swap-partitions-discouraged-on-ssd-drives-are-they-harmful#964933 (accessed Apr. 16, 2022).


Not able to boot

Recently, I failed to boot into my laptop. I was shocked.

home contains a file system with errors, check forced.
home: Inode 12976129 seems to contain garbage.
home: UNEXPECTED INCONSISTENCY; RUN fsck MANUALLY.
        (i.e., without -a or -p options)
fsck failed with exit status 4.

Then not able to mount the home partition, I was prompted to login as root. However, I was too nervous, I forgot what is my root password.

Luckily, I always have an Arch Linux LiveUSB, though it was 2020 release. I boot into it. Then the screen is tearing, due to the graphic card issue (NVidia). I tried to remember how I did the installation previously. At the end, it involves BIOS to change the graphic card to non Discrete Graphic Card. Boot again, yes, success boot into LiveUSB.

The next thing is, I immediately run fsck to check the partition again. And auto fix all prompts.

During the fix, fsck shows me such frightening screen.

Luckily there is no read error caused by bad sector.

After finish running fsck, I reboot and no more issue to boot into Linux.

Backup! Backup! And always do backup! And I should remember my root password!

NVidia and hibernation issue, partially solved

In my previous post, I mentioned about NVidia and xcompmgr, it is not true reason that causes the Chrome not updating the display.

The root cause is partially found. The issue is caused by the optimus laptop (dual graphic card, NVidia with Intel). In unknown conditions, resume from hibernation will cause the Intel graphic card doesn’t work properly. This can be checked by running “glxgears” after resume. You will see the OpenGL fails to refresh on the display.

However, if installed bumblebee, then we can run “optirun glxgears”, and this solves the graphic card issue.

Children process

Now, there is a tricky issue. because I use GNOME-Do, it is not started with “optirun”, as a result, launching the application through GNOME-Do doesn’t use the NVidia graphic card. As a result, I need to quit GNOME-Do and start it with “optirun”. So, all the application launched by GNOME-Do will use the grphic card correctly.

Run with NVidia only

Unfortunately, I experienced failing to start the X window with NVidia graphic card only. And I didn’t disable Intel graphic card, because it becomes a waste for an optimus laptop. As a result, I cannot confirm whether if only using NVidia graphic card, will the display refresh issue exist.

But so far, I use the “optirun” to run the application, if the graphic card fails to refresh the display.

C++ future

Recently updating my hobby project Med, memory editor for Linux, still under heavy development with various bugs.

In this project, I use several C++1x features (compiled with C++14 standard). Most recent notable feature is multi-threading scanning. In memory scanning, scan through the accessible memory blocks sequentially is slow. Therefore, I need to scan the memory blocks in parallel. To implement this, I have to create multiple threads to scan through the memory blocks.

How many threads I need? I make it into variable n, default to 4. Meaning, when scanning is started, the n threads will start scanning asynchronously. When one of the thread finish scanning, the next (n+1) thread will start scanning the next (n+1) memory block, until the end.

I design the solution top-down, and implement it bottom-up. In order to design the solution for the requirement above, I created a ThreadManager (header file here). So the ThreadManager basically will let me queue the tasks that I am going to launch in parallel with n threads. After queuing all the tasks, I just need to start, then they will run in parallel as multi-threading. This is what ThreadManager is doing. If mutex is needed, it is the task need to handle with, not the ThreadManager to handle. ThreadManager just make sure the tasks are run in parallel.

This is the simple test that uses the ThreadManager.

Technically, there are several important C++ standard libraries used, vector, functional, future, mutex, and condition_variable. Vector is an STL that allows me to store a list of items as vector (just like array or list).

Since C++11, it supports lambda expression. Then using functional, I can use std::function template to create any function object.

std::function<void()> fn = []() {
  for (int i = 0; i < 4; i++) {
    this_thread::sleep_for(chrono::milliseconds(300));
    cout << "thread1: " << i << endl;
  }
};

The code above initialize a variable fn which stores an anonymous function. Previously, this can be done using callback function, which makes the code difficult to manage. By using std::function and std::vector, I can store all the anonymous functions to the vector.

Future is a very interesting library. If we are familiar with JavaScript promise or C# async, then it is similar to these (futures and promises). Whenever a task is start, it will return a future. Because we don’t know when the task will be ended. We can also do something like using a loop to check the condition of a task whether is ended, but this will be over complicated. Because future will let you handle what should be done when the task is ended.

Using future, I need not to create thread directly (though it is called ThreadManager). I can use async function to run the callback function asynchronously. It is the async that returns future. And this async function allows lambda expression as function argument. Great C++11.

C++11 supports mutex (mutual exclusion) and condition variable. Mutex can prevent race condition. When we are using multi-threading, most of the time the threads are using some shared resource. Read the empty data may crash the program. Therefore, we need to make sure when reading or writing, the resource is not accessible by other threads. This can be done by locking the mutex, so that other threads cannot continue. Then after the operation, unlock the mutex, and the other threads can lock the mutex and continue. Hence, only a single thread can access the resource.

Condition variable is used together with mutex. We can use condition variable to wait if a condition is fulfilled. When a wait is performed, the mutex will be locked (by unique lock). As a result, the thread will be blocked and cannot continue. The thread will wait until the condition variable notifies the thread to perform a condition check. If it is fulfilled, then the mutex will be unlocked and the thread will continue.

In ThreadManager, my previous code uses a loop to check the condition, if the condition doesn’t allows to run the next thread, then it will sleep a while and check again. This method is wasting the CPU resources. Because it keeps checking the condition. By using condition variable and mutex, I can just stop the thread, until it is notified to continue.

Yeah. Modern C++ is cool!

External HDD struggling

I have an HP 1T external HDD. It is dying. Sh*t!

So, I made my final struggling onto it. Though it is not 100% work as planned, I still have around 320G usable space.

Symptoms

Firstly, I found that some files cannot be deleted, I had no choice but plug out the USB cable manually. Try to chkdsk with Windows since it is NTFS partition, but the chkdsk stopped and no response during the progress. Then I know, these were the bad signs. So, have to avoid using it and get a new HDD, and move whatever files able to be moved.

Backup like sh*t

I use Linux instead of Windows, because copying out the files with Windows is damn slow. So, I have no choice but to use Linux. During copying from this pity HDD to the new HDD, the copying process will stop without warning, and the HDD failed to work. Worst, there was no way to cancel the operation, only solution to plug it out. I repeated this procedure approximately 60-70 times (heuristic guess only).

S.M.A.R.T

There is one thing I have to mention, that is S.M.A.R.T. I had enabled it on the external HDD, but it did not show any useful feature to SAVE my date.

NTFS

After copying out primary data and giving up some secondary data, I decided to re-format it as NTFS. Though I very dislike Windows, NTFS is still the main stream. NTFS and FAT32 are widely supported by the devices, for instance, LG video player. I also considered exFAT, but it is not as good as NTFS supported by Linux.

So, booted into Windows, plugged in the USB cable, format the disk without “Quick Format”, because I intended to have a thorough “chkdsk” scanning for bad sector.

Unfortunately, it was DAMN slow. To increase from 0% to 1% requires about 30 minutes. How am I going to live my following life?

Then I cancelled the format and gave up NTFS.

ext4

Since there was no more hope on NTFS, I planned to format as ext4. I run mkfs.ext4 with “-c” to check for bad blocks (something like bad sectors). But it failed. The hard disk failed to work until I re-plugged in the USB. I tried dmesg, found that there are a lot of errors like

usb 2-2: reset SuperSpeed USB device number 2 using xhci_hcd
usb 2-2: LPM exit latency is zeroed, disabling LPM.
blk_update_request: I/O error, dev sdb, sector 721688448

I concluded that it is not just bad sectors/blocks, but just failed to read the blocks.

badblocks

So, I assumed that mkfs.ext4 with “-c” or even fsck.ext4 will not solve my problem. Those bad sectors should never be accessed. So, I decided to give up those sectors, meaning, skip those factors from the partitions. This can be done by using fdisk or cfdisk, creating the partitions based on the “sector” unit instead of size. We can create the partition to occupy the bad sectors area, then create next partition after it, and then delete the partition that has bad sectors.

Then, the next question is how to find the bad sectors. mkfs.ext4 and fsck.ext4 cannot solve, because they are checking for the bad sectors thoroughly through the partition. The solution is to use “badblocks”.

There are two things have to know, i) sector and ii) block. They are different things. badblocks command can identify the bad blocks, but not the bad sectors. However, fdisk allows us to get the total number of the sectors.

Now, we can do some maths here. Let’s say you run the “fdisk -l”, and get this,

Disk /dev/sdb: 931.5 GiB, 1000204886016 bytes, 1953525168 sectors

The total number of the sectors of the hard disk is 1953525168.

Now, to get the total number of blocks, use “cat /proc/partitions”, you will get something like this,

major minor  #blocks  name

   8        0  976762584 sdb

So, that is the total number of blocks, 976762584. And you can do the calculation, 976762584*2 = 1953525168. So, 1 block = 2 sectors.

This is important information, because when we use the badblocks, the values are shown in block unit. But when we want to create partitions, we are using sector unit.

So, when we run the badblocks like

badblocks -v -s -o bad.txt /dev/sdb

It will show something like

Checking blocks 0 to 976762583

which is the first block (0) until the last block (976762584 -1).

Now, in case we stop/interrupt the badblocks, we can continue from any where we want. Or, we can just start from any block. For instance

badblocks -v -s -o bad.txt /dev/sdb 976762583 488381292

where the 976762583 is the last block we want to check, and 488381292 is the start block we want to check. (Please read the manual in detail.)

Result

So, based on these tools and information, finally I found that there is around 320G contiguous safe space. So, I create the partition for it, and finally format it at ext4. Since it is a dying hard disk, I will not use it to store primary data, but secondary data and secondary backup. (Secondary data is unimportant; secondary backup is the duplicated backup, not one and only one.)

Actual plan for the next stage

Unfortunately, because the hard disk has critical failure, I cannot implement the next stage.

In my expectation, the hard disk may have multiple large, contiguous, and safe space. For example, 0-25% from the beginning is safe, and 60-100% is safe. As a result, I can create 2 partitions for these space. This is what I actually want. If this really happen, then I can use the LVM so that I can combine both partitions as a logical volume, and finally mkfs on it.

But since it does not happen, I cannot test on the LVM.


Search song that plays on your computer (Linux)

Since I am working as freelance developer, I spent most of my “otaku” time with Animenfo Radio. Now, when listening with some nice songs you like, and you would like to know what the song is, then you can use Shazam to detect it. But using Shazam requires you to turn on your volume and use your mobile phone to detect it.

What if, you are listening the songs with your ear-phone?

To make it work on your Linux computer,

  1. Listen to a music or song, make sure it is still playing
  2. Run pavucontrol (PulseAudio Volume Control), install it if you didn’t
  3. Open a music searching website such as Midomi (so far I only know this website)
  4. Click the recording button (make sure it starts recording), allow using microphone as prompted by the web browser
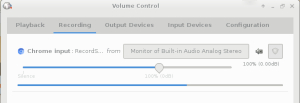
  5. Then you will see this in pavucontrol
  6. PulseAudio Volume Controller record audio
    PulseAudio Volume Controller record audio
  7. There are two options, one is “Built-in Audio Analog Stereo”, another is “Monitor of Built-in Audio Analog Stereo”. Choose the “Monitor” something will redirect your computer audio output to your computer recorder (input).
  8. Then, the website like Midomi will get what you are listening, and submit for a search!

Yeah! No Shazam, and you can search when you are listening with the ear-phone.

Technology that you must know

Linux, git, ssh, and Docker.

Linux is the most flexible OS kernel in the world right now. It is used in supercomputer, personal computer, server, embedded system like smart vacuum cleaner, mobile phone, smart TV, etc. Firstly because it is open source, everyone can study it, modify it, and redistribute it. Secondly, thanks to GPL (license). Because of GPL, anyone who use Linux need to open source their code. Those bossy people who knows Windows only and like to earn money without paying any efforts, and never understood programming and programmers, they will never understand the power of Linux and GPL.

git, like Linux, the main author is Mr. Torvalds. It is the most popular source code and revision management tool in the world right now. Those who only know GUI will never understand the power of text files. Those who don’t know what is open source are even more out of their topics.

SSH, with the advancement of cloud computing, you need to access to remote computer or server, SSH is your need!

[B]locking an SSH port for a Linux user is like taking a mouse away from a Windows user! (Powers, 2015)

Then lastly is Docker. It is an OS level virtualisation. The development environment and production environment always has a gap. Therefore, to develop a system in an environment as similar as the production is always a need. For the software level, we can use rbenv or rvm for Ruby, virtualenv for Python. However, if the production environment uses stable version of PHP and Apache, and your working computer is using the latest version of PHP and Apache, are you going to uninstall the latest version and install the stable version? If you have multiple projects, are you going to buy many computers for each of them? One of the solution is virtualisation using virtual machine like VirtualBox. But when we are using virtual machines, we need to reserve the memory and hard disk space to the virtual machines. And some of the hardware cannot be shared, but virtualised, like the graphic card and network card. However, if using container like Docker, it can access the hardware and share the OS libraries. You can also run the GUI application as it is running on the host computer. For those Windows users they will not understand, because Docker is based on Linux technology. However, you can still using Docker on Windows and Mac OS X.

Ubuntu with BCM43228


My campus lab has the Dell desktops. I am not sure the model, but the network devices are Broadcom BCM43228. As a result, after installation of the Ubuntu (they were not installed by me), Ubuntu cannot get WiFi connection to online.

Since my student mentioned that Windows can use the ethernet cable to share the wireless network, I asked him to help to share the wireless network from Windows on the other Dell desktop, and connect to the target Dell desktop.

This step works.

Next, I followed this Q and A post, just followed exactly all the commands there. Then reboot.

Yes! It works. Now, my students can test Ubuntu.

Arch Linux in MacBook Air

This is not a new stuff. You can get some tutorials from Internet. And it is very interesting when I did this, because I learnt new things. The following procedures are based on what I remembered. So, it may not be 100% accurate, since I am a forgetful person. 😅

What I did was reading the Arch Linux Wiki page. Then, followed the instructions as much as possible, and do some trials and errors. Remember to backup everything necessary. And try this at your own risk.

MacBook Air preparation

Before installing, firstly do the partition using Mac OS X itself. The tool can be found in /Applications/Utilities/Disk Utility.app. Then select the drive, not partition, at the left-hand panel. Next, click the “Partition” tab at the right. Make sure that you have enough disk space for the Arch Linux installation including the disk space for /home. In my case, I created three partitions at the end of the drive. One for root, one for swap, and one for /home. These three partitions are formatted in FAT32.

Since MacBook Air uses EFI to boot, and I am new to UEFI boot, so I installed rEFIt (Mac disk image). After installing rEFIt, reboot the MacBook then will show the options like this. That means, you have successfully installed rEFIt.

Arch Linux installation

Firstly, make sure you know how to install Arch Linux. Then, prepare a live USB for Arch Linux installation. Insert the USB to MacBook, then reboot, and hold the Alt/Option key. Then you will be shown a screen to choose booting into rEFIt or Arch Linux UEFI.

Choose Arch Linux UEFI and boot into Arch Linux for installation. Firstly, format the 3 partitions created in Mac OS X to what you want. In my case, I formatted /dev/sda3 and /dev/sda5 to ext4, and /dev/sda4 to swap. Next, we need to edit the partition type of the formatted partitions. This is done by using cgdisk instead of cfdisk, because MacBook is using GPT partition table. At the same time, you can see which partition is the EFI system partition. In my case, it is /dev/sda1, and it is FAT32 format. Hence, I mounted /dev/sda3 to /mnt, /dev/sda5 to /mnt/home, and /dev/sda1 to /mnt/boot.

Get the internet connection using netctl. Then proceed pacstrap as usual, arch-chroot and do some configurations.

Then, the GRUB installation took me some time. I used GRUB instead of gummiboot, because I know nothing about gummiboot yet. Follow the Wiki instruction, and please note that $esp refers to the mount point of the EFI system partition. In my case, it is /boot (after arch-chroot). After installation of GRUB, then generate the GRUB configuration file.

After installation, I found that there are /boot/EFI/Apple/, /boot/EFI/grub/ and some other files in /boot mount point.

Reboot.

If success, no need to hold the Alt/Option key, rEFIt will prompt you to choose to boot into Mac OS X or GRUB. Boot into Arch Linux through GRUB to check whether you succeed or not.

Post-installation

After installing Arch Linux, do the configurations, add users, install packages, install desktop environments, X11, setup the audio, install NetworkManager, etc.

There are three more things I concerned: i) graphics card, ii) touchpad, and iii) keyboard.

I installed Nouveau driver for the graphics card instead of NVIDIA. As the graphics card is GeForce 320M, it is under the N50 family (refers here). Therefore, I tried to install nvidia-340xx and nvidia-340xx-libgl. But the X11 does not work. At the end, I use Nouveau driver.

Next, the Synaptics input driver works fine in MacBook Air. But there is a little unexpected behaviour. Clicking (not tapping) the bottom-right cordern of the touchpad does not produce a right-click, but still a left-click. But in Mac OS X, clicking at bottom-left and bottom-right are different. Furthermore, some configurations have been done, such as two fingers tap and three fingers tap.

Finally, the keyboard is also configured based on the Wiki. I configured the Fn key and also swapped the Alt/Option key with the Command key. So that it works more like usual keyboard layout.

So, the demo video above first shows the rEFIt, then boot into Arch Linux using GRUB. As I have installed many desktop environments, I chose GNOME and launched the session.

RIME 中州韵输入法引擎之“五笔朙月流”

又一篇用中文写的。因为这篇反正就是关于中文输入法引擎——RIME中州韵输入法引擎——而写的。这中州韵输入法引擎是从Arch Linux的维基那里看到的。它是一种非常奇特的输入引擎。因为它可以让使用者简单地自制理想的输入法。

在Linux,有好几种中文输入法,谷歌拼音、搜狗拼音、SunPinyin等。其它非拼音输入法也有,如五笔输入法、仓颉输入法。本人虽曾经想学仓颉输入法,但因为太难记难用,最后放弃。因为有些生字不晓得如何读,拼音是没用的,所以最后就学了五笔输入法。

五笔输入法,只要懂得字形就可以输入了。因此用五笔输入比拼音来得准确。比如输入名字,用一般的拼音会出现很多选择,而这些“候选字”要一一看过,是相当的累。而若用五笔输入法,就可以把“候选字”减少到一两个罢了。但本人因为不熟悉五笔输入法,尤其在跟朋友在线对话时,拼音会是基本的思考方式,所以本人用拼音会比五笔来得快。因此,五笔和拼音两种输入法一起使用的话,对我来说就会出现因切换输入法而迟缓和多余动作的问题。因此,最理想的方式就是将两种输入法融合,不需要切换,以五笔为优先,因为五笔输入后,候选字词会比拼音来得少。能够达到这种理想输入法的,就是这个中州韵输入法引擎。

这中州韵输入法引擎,在我用的时候发现有一个字,因为台湾繁体和大陆简体有一些差别,所以中州韵输入法引擎本身的有些字用了不太一样的代码,就是“々”和“𠚤”。但中州韵输入法引擎可以用简单的方法让我解决这个问题。不仅如此,我还借此机会加入“绘文字”。因此,我就先制作了自用的五笔输入法。用这个的话,就可以轻松的输入我要的表情绘文字了😁。

但融合两种输入法,说容易也不是很容易,因为没有完善的说明书。因此本人就在百度贴吧里询问了。经过高人指点,后来就尝试融合。起初有几个问题无法解决,但勉强还是可以使用。后来根据苍颉检字法的制作,终于完成“五笔朙月流”输入法了。用这个输入法,就可以拼音加上五笔,输入人名和跟朋友对话都不成问题了。而且还可以反查五笔代码,即在不知五笔的代码是什么的情况下,还可以反查,这样的话就可以同时学习五笔输入法了。强!

这“五笔朙月”和“五笔拼音”是不同的。五笔拼音无法用拼音输入句子,而这“五笔朙月”就可以做到这点。

源码可在此处下载。